Unleash Your Inner Electrician: Powering Your Fence with a 12V Car Battery
If you’re in need of a reliable and cost-effective way to keep your livestock contained, an electric fence can be an excellent solution. Unlike traditional fences, electric fences can be quickly and easily set up with minimal tools and expertise. Plus, they’re highly effective at keeping animals in and predators out.
But how do you set up a 12V electric fence? In this blog post, we’ll walk you through everything you need to know. From choosing the right charger to installing the fence post and wiring, we’ll cover each step in detail. Whether you’re a seasoned farmer or just starting out, the information in this post will be invaluable.
So grab a cup of coffee, put on your work boots, and let’s get started!
Choosing Your Car Battery
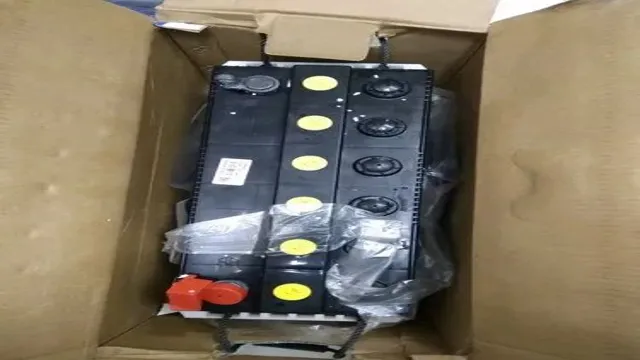
If you’re planning on setting up a 12v electric fence, you’ll need a car battery to power the system. Choosing the right battery can be a bit confusing, but there are a few key things to consider. First of all, you’ll want to make sure the battery has enough capacity to handle the load of your fence.
It’s a good idea to calculate the total amperage required and choose a battery with a rating that’s higher than that. You’ll also want to consider the size and weight of the battery, especially if you need to move it around frequently. Finally, make sure to choose a battery with the right terminal type to match your fence setup.
With these considerations in mind, you should be able to choose a car battery that will power your electric fence reliably and efficiently.
Consider the Amp Hours and Reserve Capacity
When it comes to choosing a car battery, considering its amp hours and reserve capacity is essential. Amp hours refer to the amount of energy the battery can deliver over a certain period, typically measured in hours. On the other hand, reserve capacity is the time a battery can supply a specific amount of current before dropping below a certain level.
Both factors play a significant role in determining the suitability of a car battery for your vehicle. For instance, if your car has a lot of electronics or high-powered accessories, a battery with a higher amp-hour rating will be better suited to handle the demand. Similarly, a battery with higher reserve capacity will ensure that your car starts reliably in extreme weather conditions, or if you forget to turn off the headlights.
It’s always best to match the battery specifications to the needs of your car. Consider consulting a professional mechanic or a knowledgeable sales representative when choosing a new battery. This will help you to make an informed decision that ensures optimal performance and longevity of your car battery.
Overall, while selecting the perfect car battery, it’s crucial to keep an eye on the amp hours and reserve capacity, as these specifications determine the battery’s performance and reliability. Choosing the right battery will undoubtedly make all the difference in ensuring that your car runs smoothly and efficiently.
Look for a Sealed AGM or Gel Battery
When it comes to choosing the right car battery, it’s important to look for one that is sealed and maintenance-free. This is where AGM or gel batteries come in. These types of batteries are sealed, which means that they’re less likely to leak and are less hazardous than other types of batteries.
Additionally, they require very little maintenance, which makes them a great choice for those who don’t have a lot of time or knowledge when it comes to maintaining their car battery. Plus, AGM and gel batteries are designed to perform well in a variety of conditions, making them ideal for those who live in extreme climates or who need a battery that can handle a lot of use. So if you’re in the market for a new car battery, be sure to look for one that is sealed and maintenance-free, such as an AGM or gel battery, to ensure that you get the best performance and longest lifespan possible.
Selecting the Right Charger
If you’re planning on setting up a 12v electric fence using a car battery, it’s important to choose the right charger to ensure that your electric fence operates effectively and safely. There are differing types of chargers available in the market, ranging from low-power chargers suitable for small paddocks to high-powered units that deliver electricity over long distances. For a 12v electric fence powered by a car battery, it’s recommended to choose a charger that provides enough power to cover your electric fence’s total length and perform efficient energy management.
Using a charger with too little output could lead to underperforming or ineffective electric fencing. If you’re unsure what type of charger to choose, you can always reach out to fencing experts who can suggest the right charger and ensure proper installation to achieve optimal performance. In conclusion, selecting the appropriate charger for your 12v electric fence with a car battery is crucial to guarantee efficient operation and safety.
Pick a Charger with a Rating of at Least 10% of Battery Capacity
When it comes to selecting the right charger for your device, it’s important to consider the battery capacity. A good rule of thumb is to choose a charger with a rating of at least 10% of your battery’s capacity. For example, if your device has a 3000mAh battery, consider a charger with a rating of 300mAh or higher.
This ensures that your device will charge efficiently without damaging the battery. Choosing a charger with a lower rating may result in slower charging times or even damage to the battery over time. So, be sure to take the time to research and choose a charger that is compatible with your device’s battery capacity.
By doing so, you will ensure that your device is charged quickly and safely each and every time you use it, giving you the best possible performance.
Make Sure the Charger is Compatible with Your Battery Type
When it comes to charging your battery, it’s crucial to make sure that the charger you use is compatible with your battery type. Before purchasing a charger, you should first identify your battery type, as there are various types of batteries with different charging requirements. Some common types of batteries include lead-acid, nickel-cadmium, lithium-ion, and nickel-metal hydride.
Once you’ve determined your battery type, look for a charger that is specifically designed for that type of battery. Using the wrong charger can result in inefficient charging, shortened battery life, or even damage to the battery. So, take the time to find the right charger for your battery and ensure that you follow the manufacturer’s instructions to get the most out of your battery and charger.
Consider a Solar Charger for Remote Locations
If you’re planning to take a trip to a remote location, a solar charger can be a game-changer. But how do you choose the right one? The first thing to consider is the capacity of your charger. The higher the capacity, the more energy it can store, and the longer your devices can stay charged.
Next, check the output current of the charger, as this determines how fast it can charge your devices. You’ll also want to consider the size and weight of your charger if you plan on carrying it around with you. Finally, think about the type of device you’ll be charging – some chargers come with universal ports, while others are designed for specific devices.
By selecting the right charger, you can stay connected and powered up no matter where your adventures take you.
Assembling Your Electric Fence
When it comes to assembling your 12v electric fence with a car battery, there are a few steps you need to follow to ensure its effectiveness. First, you need to choose the right type of wire for your fence. For electric fences, we recommend using high-tensile steel wire since it’s durable and can withstand harsh weather conditions.
Next, ensure that your battery is fully charged to avoid any power interruptions. It’s crucial to invest in a good quality charger to maintain your battery’s health and prolong its lifespan. You also need to install a grounding rod to complete the circuit and prevent voltage surges.
Lastly, test your electric fence before letting your livestock or pets roam around in the area. Ensure that the fence is properly grounded and has enough voltage to deliver a shock. With these simple steps, you can easily assemble your electric fence and keep your animals safe from predators.
Gather Your Materials and Tools
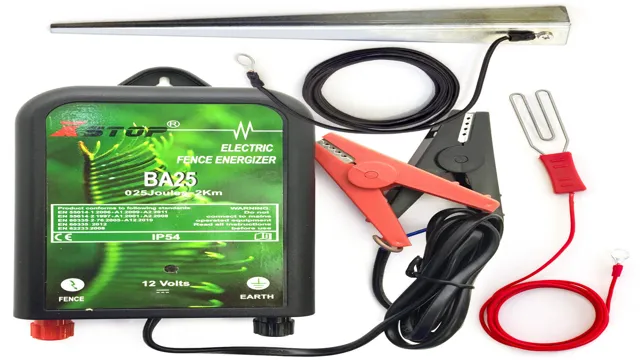
Before assembling your electric fence, it’s essential to gather all the necessary materials and tools. This will ensure you have everything you need to complete the task, and you won’t have to make any frustrating trips to the store for forgotten items. So, what do you need? First, you’ll need to purchase an electric fence charger or energizer, your fence wire, insulators, and grounding rods.
You’ll also need tools like pliers, wire cutters, a screwdriver, and a post driver. It’s important to note that the specific materials and tools you’ll need will vary depending on the type and size of your fence. Make sure to do your research and purchase the materials and tools tailored to your exact needs.
If you’re unsure, don’t be afraid to ask for help at your local hardware store or consult with a professional. By gathering all the materials and tools beforehand, you’ll be ready to start assembling your electric fence and can avoid any unnecessary delays.
Install the Posts and Tensioners
Now that you have all the materials ready, it’s time to assemble your electric fence. The first step is to install the posts and tensioners. The posts will be the backbone of your fence, providing support and stability to the wire.
Make sure to drive them deep into the ground and allow enough distance between them to ensure the wire is taut. Once the posts are in place, you can attach the tensioners to each side and loop the wire through them. The tensioners will allow you to adjust the tension of the wire over time as it expands and contracts due to temperature changes.
It’s essential to get the tension right, as it affects the shock that the animal will receive when they touch the wire. You want it to be enough to deter them but not harm them. Installing the posts and tensioners correctly is crucial to ensuring that your electric fence is effective and lasts for a long time.
Attach the Insulators and Electric Wire
When assembling an electric fence, attaching the insulators and electric wire is a crucial step. The insulators are the tools that keep the electric wire in place on the fence post and prevent it from coming into contact with the ground or any other obstacles. There are various insulators available, including plastic, ceramic, and wooden insulators.
Once you have chosen the insulators, the next step is to attach the electric wire to them. It is important to ensure that the electric wire is tightly secured to the insulators to prevent it from sagging or falling off. This can be achieved by using appropriate clips or clamps to clamp the wire onto the insulators.
Before connecting the electric fence energizer, it is essential to test the voltage of the electric wire to ensure that it is sufficient to keep the animals away. By following these steps, you can assemble an effective electric fence that will keep your livestock safe and secure, while also being easy to maintain.
Testing and Maintenance
A 12v electric fence powered by a car battery is an effective solution for keeping livestock contained and predators out. However, testing and maintenance are essential to ensure safety and functionality. The first step is to regularly check the voltage of the battery, using a voltmeter or multimeter, to ensure it is fully charged and capable of powering the fence.
It’s also important to check the wires and connectors for any damage or corrosion to prevent short circuits and reduce the effectiveness of the fence. In addition, periodic testing of the fence with a tester is crucial to ensure that the voltage is consistent and sufficient to deter animals. Finally, keeping the battery charged and replacing it when necessary is important for the longevity and effectiveness of the fence.
By following these steps, a 12v electric fence powered by a car battery can provide reliable protection for livestock and peace of mind for farmers.
Test the Fence with a Digital Voltmeter
If you want to ensure that your electric fence is functioning optimally, testing it with a digital voltmeter is a great maintenance practice. A digital voltmeter is an essential tool that checks the voltage levels and identifies any faults in the electric fence system. By testing the voltage levels at various points of the fence, you can ensure that it is free from any short circuits and has adequate grounding.
Remember, a poorly maintained electric fence could put the safety of your livestock and pets at risk. Therefore, it’s essential to perform regular maintenance on your electric fence, including testing it with a digital voltmeter. Plus, this tool is incredibly efficient, easy to use and saves you time and costs associated with re-installing a new fence.
Ultimately, using a digital voltmeter is a reliable way to ensure that your electric fence is working efficiently and effectively, giving you peace of mind.
Regularly Check for Damage and Make Repairs As Needed
Regularly checking for damage and making repairs as needed is crucial for the longevity of any system. Whether it is your car, your house, or any other system you rely on, it is important to stay on top of things. The same goes for any electronic device.
Regular maintenance and testing can help you avoid costly repairs in the future. It is essential to keep all your connections clean and free of debris. This will not only extend the lifespan of your device but also ensure that it operates at peak performance.
Don’t overlook simple things like frayed wires, loose connections, or even dust that can accumulate over time. Taking the time to perform regular maintenance can significantly reduce the risk of a malfunction occurring. So, remember to keep your system in top shape by performing regular checks, and don’t hesitate to make repairs when needed.
Conclusion
In conclusion, using a 12v electric fence with a car battery is a clever way to keep unwanted guests out of your property. It’s like a forcefield that uses the power of your car to deter intruders and protect your valuables. Plus, it’s a great reminder that sometimes, the simplest solutions can be the most effective.
So go ahead, electrify your fence with a car battery and let safety be your superpower!”
FAQs
What is the best type of car battery for a 12v electric fence?
The best type of car battery for a 12v electric fence is a deep cycle battery, as it is designed to handle frequent draining and recharging.
How long will a 12v electric fence run on a car battery?
The amount of time a 12v electric fence will run on a car battery can vary depending on factors such as the strength of the battery, the size of the fence, and the type of animals being contained. However, on average, a car battery can power a 12v electric fence for 7-10 days before needing to be recharged.
Can a 12v electric fence be connected to a solar panel instead of a car battery?
Yes, a 12v electric fence can be connected to a solar panel instead of a car battery. This is a great option for those who want a more sustainable and environmentally-friendly power source for their fence.
How do I properly maintain a 12v electric fence with a car battery?
To properly maintain a 12v electric fence with a car battery, you should regularly check the battery’s charge level and recharge it as needed. You should also inspect the fence for damage, replace any faulty parts, and keep the area around the fence clear of debris to prevent any electrical shorts.