How to Wire Your Battery-Operated Electric Toy Car: A Complete Diagram Guide
Do you have an interest in building a battery electric toy car? If so, you must be wondering about its wiring diagram. Well, you have landed on the right page. In this blog, we will guide you through the wiring diagram of a battery electric toy car, step by step.
A battery electric toy car is a fun activity for kids and adults alike. Not only is it entertaining, but it also teaches valuable skills like problem-solving, creativity, and patience. However, building one can be a challenging task, especially when it comes to wiring the car.
The wiring diagram of a battery electric toy car comprises several components, including the battery, motor, switch, and wires. Each component has a specific role and must be connected in the right way to ensure the smooth running of the car. Therefore, in this blog, we will walk you through everything you need to know about the wiring diagram of a battery electric toy car.
From the tools you need to the step-by-step process, we’ve got you covered. So, grab your tools and buckle up, because we’re about to dive deep into the world of battery electric toy car wiring diagrams.
Introduction
If you’re looking for a wiring diagram for a battery-operated electric toy car, you’ve come to the right place. The wiring inside these toys can be complex, but with a proper diagram, you’ll be able to figure it out in no time. In general, these toys typically have a battery, a motor, and a controller that regulates the speed and direction.
The battery supplies electricity to the motor, while the controller ensures that the car moves smoothly. Most toy cars also have headlights, taillights, and other accessories that need to be wired in as well. By following a wiring diagram, you’ll have a clear idea of which wires to connect and where they should go.
Whether you’re a seasoned DIYer or a newbie, wirings diagrams can help anyone get their battery-operated toy car up and running in no time!
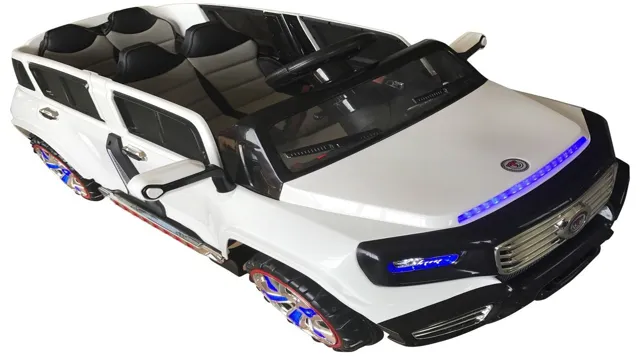
What is a battery electric toy car?
A battery electric toy car is a small, powered vehicle that is designed to be driven by children. These cars are powered by rechargeable batteries and are often made to look like real cars. They come in many different sizes and styles, from small ride-on cars to larger, more complex models that can be controlled by a remote.
Battery electric toy cars are a great way for children to explore the world of driving, without any of the risks associated with real cars. They’re not just fun, but also offer a great opportunity for children to develop their motor skills and spatial awareness. If you’re looking for a way to keep your child entertained and engaged, a battery electric toy car is a great option.
It’s a safe and exciting way for your child to learn new skills while having fun. So, why not give it a try and see how much joy it can bring to your child’s life?
Why do you need a wiring diagram?
A wiring diagram is an important tool when it comes to working with electrical systems and components. It provides a clear visual representation of the wiring connections and electrical circuitry, making it easier to understand and troubleshoot any issues that may arise. Without a wiring diagram, you could potentially damage electrical components or create dangerous situations by improperly connecting wires.
It’s like trying to build a puzzle without the picture on the box – you may be able to figure it out eventually, but it will take longer and there’s a higher chance of making errors. By having a wiring diagram, you have a clear blueprint to follow, making your work safer, easier, and more efficient. So if you’re working with electrical systems or components, don’t skip the wiring diagram – it’s an essential tool that can save you time, money, and potentially even your safety.
Understanding the Wiring Diagram
If you’re planning on fixing or modifying your battery-operated electric toy car, you’ll need to understand the wiring diagram. The wiring diagram shows the electrical connections between various components, such as the motor, battery, switches, and lights. By following the wiring diagram, you can troubleshoot problems, make modifications, or upgrade components.
Each wire is color-coded and labeled, making it easy to identify which wire goes where. Be sure to follow safety guidelines when working with electricity, such as disconnecting the battery and wearing rubber gloves. With a little bit of patience and careful attention, you can learn how to read and understand the wiring diagram and take your battery-operated electric toy car to the next level.
Parts of the car that needs wiring
When it comes to understanding the wiring system of a car, it’s essential to know which parts of your car require wiring. From the headlights to the ignition system, most of the parts in your car need to be connected to the electrical system. The wiring diagram helps you understand the different connections and their functions, allowing you to troubleshoot any issues that may arise.
Let’s start with the headlights; they require wiring to turn on and off and dim or brighten. This wiring is usually located beneath the hood of your car. The same goes for the taillights and parking lights.
The engine control module, which is the brain of the car’s electrical system, also requires proper wiring connections. It receives information from the sensors in your car and adjusts various functions such as fuel injection timing and ignition timing. Then there are the audio and entertainment systems that require wiring to function.
These include the speakers, stereo, and navigation systems. The power windows and door locks also depend on wiring for their function. They’re connected to switches for powering them lift up or down.
Finally, the ignition system of your car is also a crucial component that requires wiring. It includes the starter, battery, fuel injectors, and spark plugs. If any of these components experience wiring issues, it can lead to engine failures.
In summary, various parts of a car require proper wiring to function correctly, and it’s essential to understand the diagrams to troubleshoot any electrical issues that may arise. A well-maintained electrical system is crucial to a car’s overall performance and safety.
Reading the diagram easliy
Understanding wiring diagram is crucial for anyone working with electrical systems in automobiles or other machinery. It is a visual representation of the wiring system, including connections, pathways, and components. Usually, wiring diagrams have symbols that represent the parts and their respective connections.
Most of the time, the diagram has a label or a legend to help you identify and understand the symbols. The colors used in wiring diagrams can also give you an idea of the type of connection and the voltage requirements, although these colors can vary from manufacturer to manufacturer. Understanding and interpreting wiring diagrams requires visual intuition and critical thinking skills.
By using a systematic approach, you can follow the electric circuits’ path, identify the electric components, understand how the different parts work together and find and fix electrical faults or malfunctions. Studying wiring diagrams carefully can help you save a lot of time, headache and prevent costly errors and accidents.
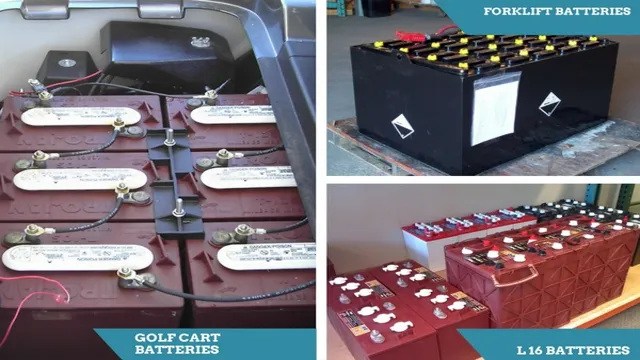
Colors codes used for coding
When it comes to understanding the wiring diagram, one important aspect to note is the usage of color codes for coding. These color codes are used to differentiate and identify various electrical wires in the circuit. The colors commonly used include black for power, white for a neutral wire, green or bare wire for ground, and red or blue for switch control.
Understanding and recognizing these codes are crucial for proper installation and maintenance of the circuit as it ensures that the correct wires are connected in the right place. Moreover, misinterpretation of these codes can lead to electrical hazards or damage to the circuit. Therefore, it is essential to have a clear understanding of the color codes used for coding in the wiring diagram.
By doing so, you can guarantee the safety of your electrical system while ensuring that everything is installed and maintained correctly.
Step-by-step Wiring
If you’re looking to wire a battery-operated electric toy car, fear not, as it’s not as difficult as it may seem. The first step is to identify the positive and negative terminals of the battery, as well as the motor, and the switch. Once you have done that, connect the red wire from the battery to the red wire from the switch, and then connect the other wire from the switch to the motor.
Make sure to use electrical tape to secure the connections. Then, connect the black wire from the motor to the black wire from the battery, again securing the connection with electrical tape. Finally, test the car to make sure it’s working correctly by turning the switch on.
If it doesn’t turn on, check the connections and make sure they are all secure. It’s that simple! Happy driving!
Gathering the materials
When it comes to wiring, the first step is to gather all the necessary materials. You will need electrical wires, wire connectors, wire strippers, and a voltage tester. Make sure you choose the appropriate gauge of wire for your project.
Once you have your materials, it’s time to begin the wiring process. The first thing to do is to turn off the power source. This will prevent any accidents or injuries during the wiring process.
Next, strip about ⅜ inch of insulation from the ends of the wires using your wire strippers. Then, connect the wires using wire connectors, ensuring that the colors match. Finally, use a voltage tester to check that the wiring is properly connected and the power is off.
By following these steps, you can ensure a safe and successful wiring project.
Disconnecting old wiring
Disconnecting old wiring can be a little bit intimidating, but it’s not as difficult as it may seem. The first step is to make sure that the power to the circuit you’re working on is turned off. This is an important safety precaution, as it can be dangerous to work on live wires.
Once you’ve confirmed that the power is off, you can begin removing the old wiring. Start by identifying the wires that need to be disconnected and removing any wire nuts or connectors that are holding them together. It’s a good idea to label the wires with tape or a marker so that you know which ones go where when you’re ready to reconnect everything.
Once the wires are disconnected, you can remove them from any fasteners or clamps that are holding them in place. With the old wiring removed, you’re ready to start installing the new wiring. With a little bit of patience and attention to detail, you can successfully complete your wiring project and ensure that your home is safe and functional.
Reconnecting new wiring
When it comes to reconnecting new wiring, it can be overwhelming, even for the most experienced DIYers. However, with a few steps, you can ensure that you’re doing it correctly and safely. First, identify the wires you need to connect.
You may want to label them before you remove them from their previous connections to ensure you remember which wire is which. Strip the ends of the wires and twist them together if they’re not already. Once the wires are twisted, cover them with a wire nut to secure the connection.
Finally, test the connection using a voltage tester to ensure everything is connected correctly. Making sure you follow these steps not only ensures that your wiring is connected correctly, but it also helps prevent electrical hazards like shocks and fires. By taking the time to correctly reconnect your wiring, you’ll have peace of mind that everything is done right.
Conclusion
In conclusion, the battery operated electric toy car wiring diagram is a fascinating look at the intricacies of modern-day toys. From the power source to the motor, from the switches to the circuit board, every component plays a vital role in bringing our favorite toys to life. It’s truly incredible how a few simple wires and a battery can create such joy and entertainment for children (and adults!).
So, the next time you see a kid cruising around in their battery-powered car, take a moment to appreciate the engineering marvel that made it all possible. After all, who knows – that child might just grow up to be a brilliant electrical engineer!
FAQs
What is a battery operated electric toy car wiring diagram?
A wiring diagram is a diagram that shows the electrical connections between components in a circuit.
Why is a wiring diagram important for a battery operated electric toy car?
A wiring diagram is important because it helps to identify the power source, the components that require power, and the connections between them. This can be useful when troubleshooting problems with the toy car.
Can I find a wiring diagram for my specific brand of battery operated electric toy car online?
Yes, many manufacturers provide wiring diagrams for their products online. You may need to search for the specific model of your toy car to find the correct wiring diagram.
What if I cannot find a wiring diagram online for my battery operated electric toy car?
If you cannot find a wiring diagram for your specific toy car online, you may be able to contact the manufacturer directly to request one. Alternatively, you may need to consult with a professional electrician or toy repair technician for assistance.