Power up Your Fencing Game with DIY Electric Fence Car Battery – A Step-by-Step Guide
Thinking about setting up your own electric fence but unsure where to start? Using a car battery to power an electric fence may seem daunting, but with the right tools and knowledge, it can be a cost-effective and efficient solution for livestock control. In this tutorial, we’ll walk you through the steps on how to build your DIY electric fence with car battery-powered voltage. We’ll cover the basics of electric fencing, the tools you’ll need, and the steps to safely set up and maintain your fence.
So, if you’re ready to take on your next DIY project, grab your safety gear, and let’s get started!
What You’ll Need
If you’re looking to build your own electric fence, you’ll need a few things to get started. One essential item is a car battery, which will power the fence. You’ll also need insulated wire, fence posts, and a charger that can handle a car battery’s power.
Additionally, you’ll need to consider the size and layout of your fence, as well as what animals you’re trying to keep in or out. It’s important to note that while building your own fence can save you money, it can also be dangerous if not done properly. Be sure to follow all safety guidelines and instructions and consider seeking professional assistance if needed.
With the right equipment and preparation, however, you can have a functional and effective electric fence in no time.
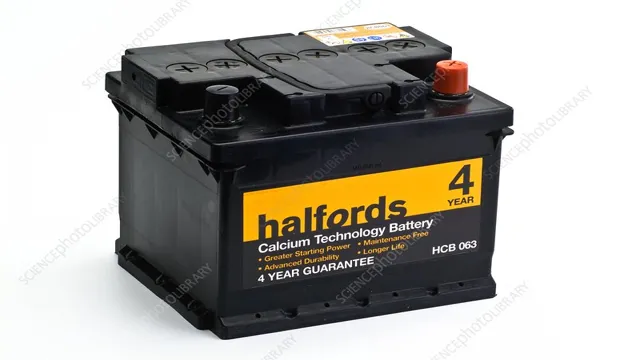
Car Battery
Car Battery When it comes to your car’s battery, there are a few things you’ll need to keep in mind. For starters, you’ll need to make sure you have the right tools on hand. This includes a wrench and a battery tester, as well as any other tools specific to your car’s make and model.
You’ll also need to make sure you have a good understanding of how your car’s electrical system works, as well as how to safely remove and replace your old battery. Once you have all of these essentials in place, you’ll be ready to start the process of swapping out your old battery for a new one.
Electric Fence Charger
If you’re considering putting up an electric fence, you’ll need an electric fence charger to power it. The charger is what supplies the fence with the electric pulse that keeps your livestock contained within its boundaries. There are a few things you’ll need to make sure you have before you can install your electric fence charger.
Firstly, you’ll need the charger itself, which is usually sold with an installation guide and warranty. Secondly, you’ll need an appropriate grounding rod, which is crucial for electrical safety. This rod will be fitted into the ground near your electric fence and will serve as the connection point for your charger.
Lastly, you’ll need insulated wires to connect the charger to the grounding rod and fence wire. It’s important to use insulated wires to prevent electricity from escaping and causing Electro Magnetic Interference (EMI) or interference with electronic devices. With these items on hand, you’ll be equipped to install your electric fence charger safely and effectively.
Insulators
Insulators are essential materials that prevent the flow of electric current, and they come in handy when working on electrical projects. To work with insulators, you’ll need a few basic tools, including a pair of insulating gloves, an insulating tape, and an insulating blanket. The gloves are worn to protect your hands from electrical shocks while handling live wires, while the tape is used to wrap the wires to prevent them from coming into contact with each other or other conductive materials.
Additionally, insulating blankets are used to cover electrical equipment, especially when working in tight spaces. They help to prevent any accidental contact with live wires, which can be dangerous. All in all, working with insulators requires attention to detail, keen observation, and strict adherence to safety guidelines to prevent accidents.
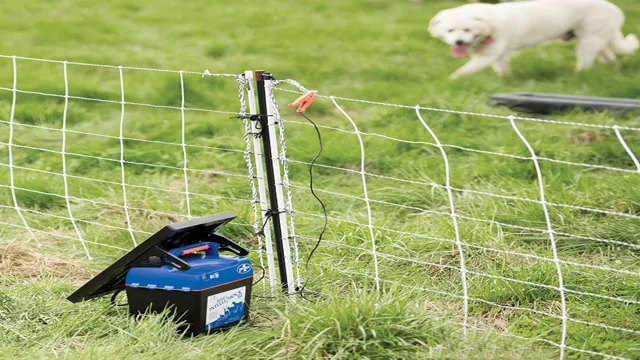
How to Set Up Your Fence
Setting up an electric fence might sound like a daunting task, but with the right tools and a little know-how, it can be a relatively easy DIY project. One way to power your electric fence is by using a car battery. Here’s how to do it: First, make sure the battery is fully charged.
Next, connect the positive wire from the fence charger to the positive terminal on the battery, and the negative wire to the negative terminal. Make sure the connections are secure and free of any corrosion. Once you have your power source set up, it’s time to install the fence itself.
Begin by mapping out where you want your fence to go and marking the spots where you’ll need to install posts. Make sure the posts are secure and level, and then attach the wire to the posts using insulators. Finally, test the fence to make sure it’s working properly before introducing any livestock or pets.
With this simple setup, you’ll have an effective and affordable solution for keeping your property safe and secure.
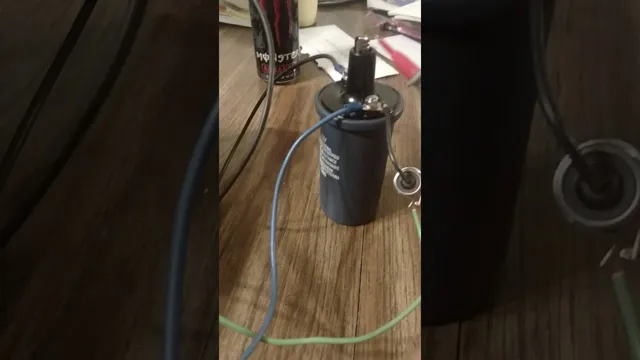
Step 1: Connect Charger to Battery
Setting up a fence for your property requires some basic knowledge of how it works. One of the most important steps is connecting the charger to the battery. This serves as the power source for your electric fence and ensures that it’s effective in keeping your livestock safe.
To do this, you’ll need to locate a suitable location to place the charger. It should be a dry and well-ventilated area, away from direct sunlight and rain. Once you’ve found a suitable spot, connect the charger to a 12V battery using the appropriate cables.
Make sure the connections are secure, and check that the voltage output matches the manufacturer’s recommendations. With the charger connected to the battery, you’re now ready to begin setting up the rest of the fence.
Step 2: Add Insulators to Fence Posts
Insulators Now that you’ve secured the fence posts, it’s time to add insulators. These critical components will ensure that your electric fence delivers an effective shock and keeps your livestock safe. Insulators are typically made of plastic or porcelain and come in a variety of shapes and sizes.
When adding insulators, make sure to attach them securely to the post using screws or nails. It’s important to space them correctly and make sure they’re at the right height. A good rule of thumb is to place one insulator every 8-10 feet and one at every change of direction.
Don’t forget to include insulators at both ends of your fence to secure the wire. Once you’ve added your insulators, you’re ready to start running wire and testing your fence. So grab some coffee and get ready to finish setting up your electric fence!
Step 3: Run Wire Through Insulators
Once you’ve installed your fence posts and tightened the tension on the wire, the next step is to run the wire through the insulators. Insulators are non-conductive fixtures that keep the wire from touching your fence posts, preventing any potential electrical short circuits. To start, you’ll need to insert the end of the wire through the first insulator, making sure it’s secure and snug.
From there, slide each additional insulator onto the wire, spacing them evenly apart. It’s important to keep an eye on the wire tension as you go, ensuring it’s taut and secure throughout the entire length of your fence. Once the wire is threaded through all of the insulators, you can attach it to the fence posts using your fence wire clips or twist ties.
This step is crucial in ensuring your electric fence operates efficiently and effectively. So, take the time to carefully thread your wire through each insulator and make sure it’s secure before moving on to the next step.
Step 4: Connect Wire to Charger
When it comes to setting up your electric fence, it’s important to connect the wire to the charger properly. Start by turning off the power to the charger and verifying that it’s at a safe level before proceeding. Then, locate the terminal screws labeled “+” and “-” on the charger.
Remove any insulation from the wire and wrap it around the appropriate terminal screw, making note of which is positive and negative. Use pliers to tighten the screws and ensure a secure connection. Once the wire is connected, turn on the power to the charger and check for any voltage readings to make sure the connection is successful.
Properly connecting the wire to the charger is an essential step in setting up your electric fence system, so take the time to do it right.
Safety Precautions to Take
If you’re planning on setting up a DIY electric fence using a car battery, it’s important to take certain safety precautions to avoid injury or damage to your property. First and foremost, ensure that you have a grounding system in place to prevent electrical shocks. Use insulated wires and plastic insulators to prevent any contact with metal parts.
If you’re working with a lead-acid battery, make sure to wear protective gear such as gloves and goggles to avoid acid contact. Also, be sure to place warning signs around your fence to keep people and animals away from the potentially dangerous electrical current. Finally, always disconnect the battery before making any adjustments or repairs to your fence to prevent accidental shocks.
With these precautions in place, you can safely and effectively install your DIY electric fence using a car battery.
Wear Rubber Gloves
Rubber gloves are an essential part of any safety precautions you take, especially when you are involved in activities that could put your hands at risk of injury or contamination. Wearing rubber gloves provides a barrier between your skin and harmful substances, including chemicals, bacteria, viruses, and other hazardous materials. By wearing rubber gloves, you can prevent skin infections, allergic reactions, and other health problems that may arise from exposure to these substances.
Moreover, rubber gloves can help you avoid cuts, bruises, and burns on your hands, which are common injuries in many workplaces. Whether you work in a laboratory, a hospital, a factory, or any other hazardous environment, always wear rubber gloves to protect yourself and maintain a safe working condition. Remember, prevention is better than cure, and wearing rubber gloves is an easy and effective way to stay safe and healthy.
Consider Voltage and Amperage
When working with electrical circuits, it’s crucial to take safety precautions seriously. One key aspect to consider is voltage and amperage. Voltage refers to the electrical pressure that pushes the flow of electricity through a circuit, while amperage refers to the actual amount of electric current flowing through the circuit.
Both high voltage and high amperage can be dangerous, and even deadly, if not properly managed. When working with electrical circuits, always make sure to check the voltage and amperage ratings of any devices or components you plan to use, and make sure they match the electrical specifications of your circuit. Additionally, wear appropriate safety gear, such as insulated gloves and goggles, and never touch electrical components or wires with bare hands.
Remember, electrical safety is essential to protect yourself and others from harm.
Conclusion: DIY Electric Fence with a Car Battery
In conclusion, building an electric fence using a car battery is like turning a lemon into lemonade – except instead of creating a refreshing drink, you’re creating a powerful barrier to keep unwanted visitors at bay. With a little bit of DIY know-how and some simple tools, you can transform a humble car battery into a formidable defense mechanism that will give your property the protection it deserves. So if you’re looking to electrify your fence line and keep your livestock safe from predators, why not give this electrifying project a try?”
FAQs
How do I set up a DIY electric fence with a car battery?
First, gather your materials, including a car battery, fence charger, wire, insulators, and grounding rods. Install the charger and connect it to the battery. Run the wire and attach insulators, making sure the fence is grounded correctly. Test the fence before putting animals in the enclosed area.
Can I use a regular car battery for an electric fence?
Yes, a car battery can be used for an electric fence as long as it is a 12-volt battery. However, it may not have enough power to run a large fence for an extended period, so a deep cycle battery may be a better option.
What is the distance a DIY electric fence can reach with a car battery?
The distance an electric fence can reach with a car battery depends on the size of the battery and the charger’s power. A 12-volt battery with a fence charger can provide up to 5,000 linear feet of fencing, but this can be reduced by factors like terrain and vegetation.
How can I maintain my DIY electric fence with a car battery?
Regular maintenance of an electric fence with a car battery includes checking for any damaged wires or insulators, ensuring the fence is properly grounded, and keeping the battery charged. It is also important to test the fence regularly to make sure it is operating correctly.