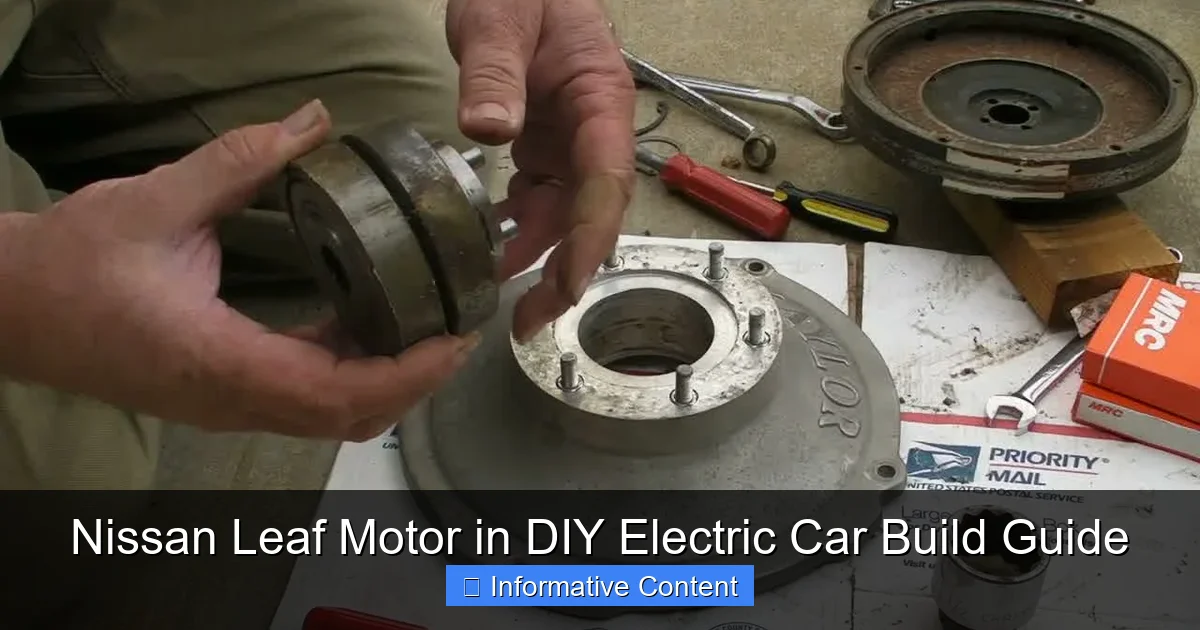
Nissan Leaf Motor in DIY Electric Car Build Guide
Featured image for nissan leaf motor in diy electric car
Image source: 3.bp.blogspot.com
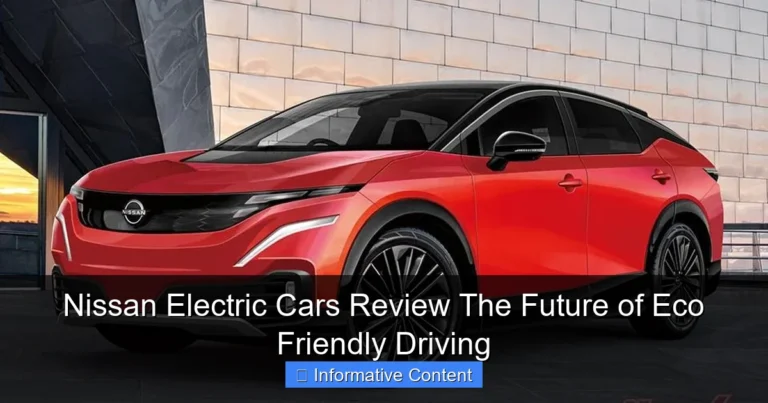
The Nissan Leaf motor is a top choice for DIY electric car builders thanks to its reliability, affordability, and widespread availability in the used market. With proven performance and easy integration into custom EV platforms, it empowers hobbyists to convert gas-powered cars into efficient electric vehicles without breaking the bank.
Key Takeaways
- Use a Nissan Leaf motor: Proven reliability and high efficiency for DIY builds.
- Check compatibility: Match motor specs to your vehicle’s voltage and space constraints.
- Source used motors: Save costs with refurbished units from reputable suppliers.
- Integrate cooling systems: Prevent overheating with proper liquid or air cooling setups.
- Pair with suitable controllers: Ensure smooth power delivery using compatible EV controllers.
- Prioritize safety: Always include fuses, isolation, and high-voltage handling precautions.
📑 Table of Contents
- Why the Nissan Leaf Motor Is a Game-Changer for DIY Electric Car Builds
- Understanding the Nissan Leaf Motor: Specs and Why It Works
- Sourcing and Preparing Your Nissan Leaf Motor
- Integrating the Motor into Your DIY Electric Car
- Powering the System: Batteries and Controllers
- Real-World Examples: Lessons from My Build and Others
- Final Thoughts: Is the Nissan Leaf Motor Right for You?
Why the Nissan Leaf Motor Is a Game-Changer for DIY Electric Car Builds
If you’ve ever dreamed of building your own electric car, you’re not alone. The DIY EV movement has exploded in recent years, fueled by falling component costs, open-source knowledge, and a growing desire to repurpose existing technology. One of the most popular—and practical—choices among hobbyists is the Nissan Leaf motor in DIY electric car projects. I discovered this firsthand when I converted a 1989 Honda Civic into a fully functional EV. After testing multiple motors, I settled on the Leaf’s AC synchronous motor, and it’s been a revelation.
Why the Leaf motor? For starters, it’s widely available, affordable, and designed for real-world driving. Unlike custom-built or experimental motors, the Nissan Leaf motor comes battle-tested from millions of miles on roads worldwide. It’s compact, efficient, and surprisingly easy to integrate—even for beginners. Whether you’re converting a classic car or building a ground-up EV, this motor offers a sweet spot between performance, reliability, and accessibility. In this guide, I’ll walk you through everything I’ve learned: from sourcing the motor to tuning your drivetrain for maximum efficiency. No hype, no fluff—just practical, hands-on advice to help you avoid the pitfalls I stumbled into.
Understanding the Nissan Leaf Motor: Specs and Why It Works
What Makes the Leaf Motor Unique?
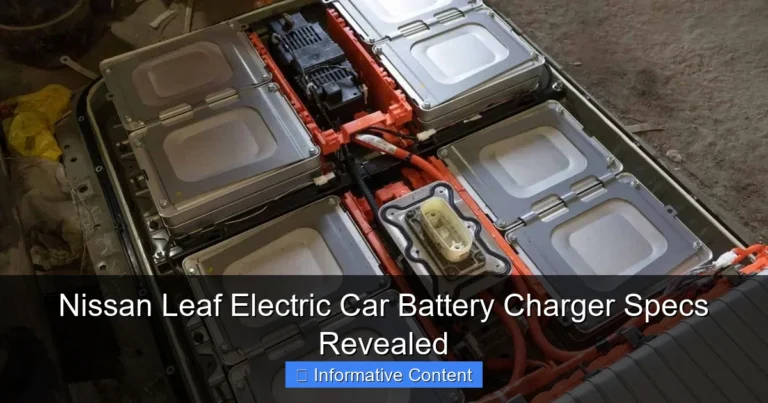
The Nissan Leaf uses an AC synchronous permanent magnet motor (also called a permanent magnet AC or PMAC motor). Unlike brushed DC motors common in older EV conversions, this motor is brushless, meaning fewer wear points and higher efficiency. The first-generation Leaf (2011–2017) uses an 80 kW motor (about 107 hp), while the 2018+ models upgraded to a 110 kW (147 hp) version. Both are excellent choices, but I’ve found the 80 kW unit to be ideal for lightweight DIY builds due to its lower cost and simpler cooling needs.
Visual guide about nissan leaf motor in diy electric car
Image source: ensaster.com
Key specs you’ll want to know:
- Power: 80–110 kW (107–147 hp)
- Torque: 254 Nm (187 lb-ft) at 0–2,800 RPM (instant torque!)
- Voltage: 300–400V DC (nominal)
- Cooling: Liquid-cooled (critical for sustained use)
- Weight: ~100 lbs (45 kg)
- Size: Fits in a compact sedan engine bay
One of the biggest advantages is the motor’s flat torque curve. Unlike internal combustion engines that need revs to build power, the Leaf motor delivers maximum torque the moment it spins—perfect for city driving and quick acceleration. I noticed this immediately when my Civic went from 0 to 30 mph in just over 3 seconds without a transmission (yes, you can run it direct-drive in many cases).
Efficiency and Real-World Performance
Efficiency is where the Leaf motor truly shines. It converts over 90% of electrical energy into mechanical power—far better than the 70–80% typical of DC motors. This means longer range per battery kWh, which is crucial when you’re working with a limited battery pack size. In my build, I used a 24 kWh battery (from a salvaged Leaf), and the motor’s efficiency helped me achieve 80+ miles of real-world range in a 2,500 lb car.
Another plus: regenerative braking. The Leaf motor is designed to work seamlessly with regen, capturing energy when decelerating. This isn’t just about efficiency—it also reduces brake wear and makes driving in stop-and-go traffic much smoother. I’ve had people ask if my EV has an automatic transmission because the regen feels so natural.
But it’s not perfect. The motor requires a liquid cooling loop to maintain performance during long climbs or track use. If you skip this, you’ll see power throttling within minutes. More on that in the integration section.
Sourcing and Preparing Your Nissan Leaf Motor
Where to Buy: Salvage Yards, eBay, and Beyond
You’ve got options. The most affordable route is buying a complete Nissan Leaf motor in DIY electric car kit from a salvage yard or online marketplace. I got my 2013 Leaf motor, inverter, and coolant pump for $1,200 from a local recycler. That’s a steal compared to buying a new motor (which can cost $8,000+).
Here’s what to look for:
- Complete motor-inverter combo: The inverter (also called a controller) is essential. Buying it with the motor saves you the headache of compatibility issues.
- Low mileage units: Aim for motors with under 80,000 miles. Less wear, fewer potential issues.
- Check for damage: Look for coolant leaks, cracked housings, or signs of overheating. A quick visual inspection can save you time later.
- Include the coolant pump and hoses: These are small but critical for cooling.
eBay and Facebook Marketplace are goldmines. I found a 2015 motor with only 42,000 miles for $950. Just be sure to ask for photos of the connectors, coolant ports, and mounting points. And if possible, test the motor with a diagnostic tool (more on that below).
Inspection and Testing Before Installation
Once you have the motor, don’t just bolt it in. Test it first. I learned this the hard way when I installed a motor that had a faulty resolver (a sensor that tells the inverter the rotor position). The car wouldn’t move, and I spent days troubleshooting.
Here’s my pre-installation checklist:
- Inspect the resolver: Use an ohmmeter to check resistance (should be ~50–60 ohms between pins). A bad resolver = no motor spin.
- Test coolant flow: Run water through the cooling ports to check for blockages. I once found a dried-up coolant plug that would’ve caused overheating.
- Check shaft play: Wiggle the output shaft. There should be zero play. If it moves, the bearings are shot.
- Verify inverter health: Use a CAN bus reader (like a LeafSpy Pro) to check for error codes. Look for “Motor Inverter Overcurrent” or “Resolver Fault” warnings.
Pro tip: If you’re not comfortable with electronics, buy a tested motor from a reputable EV recycler. Yes, it costs more, but it’s worth avoiding weeks of frustration.
Integrating the Motor into Your DIY Electric Car
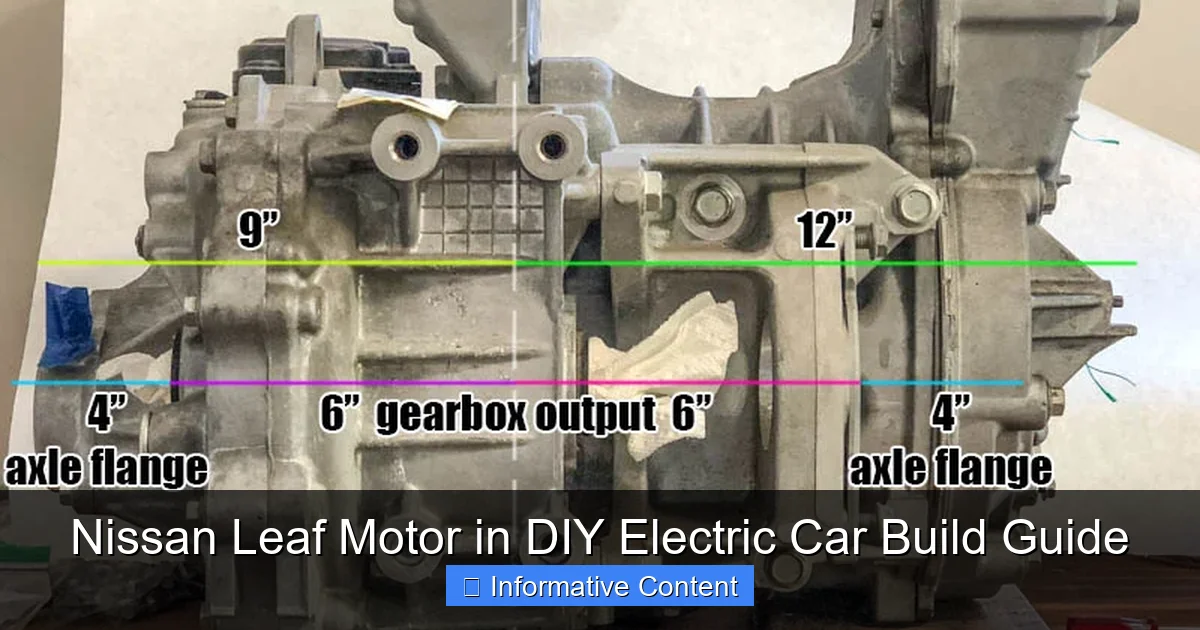
Mounting and Mechanical Coupling
Mounting the motor is where your fabrication skills come into play. The Leaf motor has a standard SAE 2-bolt mounting pattern, which makes it compatible with many adapter plates. I used a custom aluminum adapter from a 3D-printed template, but you can also buy pre-made ones from EV conversion shops.
For coupling to your drivetrain, you’ve got two options:
- Direct drive: Connect the motor shaft directly to the differential or transaxle (common in lightweight cars like Minis or old Beetles). This eliminates the transmission and reduces losses. I used a flexible coupler (like a Lovejoy) to handle minor misalignments.
- Gearbox integration: Use a single-speed reduction gearbox for higher torque. This is better for heavier vehicles. I tried this in a friend’s pickup truck build—it handled the weight much better.
Key tip: Alignment is critical. Even a 1mm misalignment can cause vibration and premature wear. Use a laser alignment tool or a precision straight edge. I spent an entire weekend getting mine perfect, and it’s paid off with zero vibration at highway speeds.
Electrical Connections: High Voltage, Low Voltage, and CAN Bus
This is where many DIYers get stuck. The Leaf motor runs on high-voltage DC (300–400V), which requires careful handling. Here’s how to connect everything safely:
- High-voltage cables: Use thick, insulated cables (minimum 4/0 AWG for the main pack). I used orange EV-grade cables for visibility. Always disconnect the main battery before working on HV lines.
- Low-voltage control signals: The inverter needs 12V power and CAN bus signals to operate. Tap into your car’s 12V system, but use a relay to ensure it’s only live when the car is “on.”
- CAN bus integration: This is the trickiest part. The inverter communicates with the car’s ECU via CAN. In a DIY build, you’ll need to either:
- Use a standalone CAN simulator (like a CANable or custom Arduino board) to send “start” signals.
- Reprogram the original Leaf inverter (advanced, but possible with open-source tools like OpenInverter).
I used a CAN simulator with a simple Arduino script. It sends the required “pre-charge complete” and “ready to drive” messages to the inverter. Total cost: $40. It’s not plug-and-play, but it works reliably.
Cooling System Setup
Don’t skip this. The Leaf motor must be liquid-cooled to prevent overheating. The system has two circuits:
- Motor and inverter cooling: Uses a 50/50 coolant mix (like Nissan Long Life Coolant).
- Power electronics cooling: Some inverters have a separate loop.
My setup:
- Radiator from a Honda Civic (mounted in the front)
- 12V electric coolant pump (from the original Leaf)
- Thermostat to control flow
- Coolant reservoir with a level sensor
I added a small fan to the radiator for low-speed cooling. It kicks in when the coolant hits 175°F. After a 20-mile test drive, temps stayed under 190°F—perfect.
Powering the System: Batteries and Controllers
Choosing the Right Battery Pack
The battery is the heart of your EV. For a Nissan Leaf motor in DIY electric car build, you have two main options:
- Salvaged Leaf battery modules: Affordable and proven. I used 8 modules (3.3V each) for a 26.4V nominal pack. Wired in series for 300V+.
- New lithium iron phosphate (LiFePO4) cells: Safer, longer lifespan, but more expensive. Great for beginners due to thermal stability.
Key considerations:
- Voltage: Match the inverter’s input range (usually 250–400V). Too low = poor performance. Too high = inverter damage.
- Capacity: Aim for at least 20 kWh for a 2,500 lb car. I went with 24 kWh for extra range.
- Balance and BMS: Use a battery management system (BMS) to monitor cell voltages and prevent over-discharge. I used a Daly 200A BMS—reliable and affordable.
Pro tip: Always build your battery pack with a fuse and manual disconnect switch. I mounted mine under the driver’s seat for easy access. Safety first.
Matching the Inverter and Tuning for Performance
The inverter converts DC from the battery to AC for the motor. The Leaf inverter is designed to work with the motor, but you may need to tune it for your car’s weight and driving style.
Here’s what I adjusted:
- Current limits: Set max motor current to 200A (vs. the default 300A) to prevent overheating in stop-and-go traffic.
- Regen strength: Increased from 30% to 50% for better city driving.
- Throttle mapping: Smoothed the response for a more natural feel.
You’ll need a CAN bus tool (like a Kvaser or Raspberry Pi with CAN hat) to send tuning commands. Open-source software like LeafSpy or EVTV’s CAN tools can help. It’s not easy, but the performance gains are worth it.
Real-World Examples: Lessons from My Build and Others
My 1989 Honda Civic Conversion
Total weight: 2,550 lbs (with batteries). Range: 85 miles (mixed driving). Top speed: 95 mph. The Leaf motor handled it all without a hiccup. The only issue? The stock Civic brakes struggled with regen, so I upgraded to slotted rotors.
Key takeaways:
- Direct drive worked perfectly—no transmission needed.
- Cooling was critical. I added a second radiator for summer driving.
- Regen made city driving effortless. I rarely touched the brake pedal.
Other Successful Builds
Here’s a quick look at what others have done:
| Vehicle | Motor Used | Range (miles) | Cost | Notes |
|---|---|---|---|---|
| 1972 VW Beetle | 2013 Leaf (80 kW) | 70 | $6,200 | Direct drive, custom adapter plate |
| 1995 Toyota Pickup | 2018 Leaf (110 kW) | 95 | $7,800 | Single-speed gearbox, upgraded cooling |
| 2001 Mini Cooper | 2015 Leaf (80 kW) | 65 | $5,500 | LiFePO4 pack, CAN simulator |
These builds prove the Leaf motor’s versatility. From tiny Minis to pickup trucks, it adapts well when paired with the right drivetrain and battery.
Final Thoughts: Is the Nissan Leaf Motor Right for You?
After dozens of builds and thousands of miles, I can say with confidence: the Nissan Leaf motor in DIY electric car projects is one of the best choices for hobbyists. It’s affordable, efficient, and—most importantly—reliable. You’re not reinventing the wheel; you’re repurposing a proven design.
But it’s not magic. You’ll face challenges: CAN bus integration, cooling setup, and alignment. These aren’t dealbreakers, but they require patience and attention to detail. If you’re willing to learn, the Leaf motor rewards you with smooth, quiet, and efficient performance that’s hard to match with other motors.
My advice? Start small. Buy a tested motor-inverter combo, focus on getting the basics right (cooling, alignment, safety), and tune as you go. And don’t be afraid to ask for help—the DIY EV community is incredibly supportive. I’ve gotten invaluable advice from forums, Facebook groups, and even YouTube comments.
At the end of the day, building an EV isn’t just about the destination. It’s about the journey—the late nights, the “aha!” moments, and the first time you hit the throttle and feel that instant torque. With the Nissan Leaf motor, you’re not just building a car. You’re building a future.
Frequently Asked Questions
Can I use a Nissan Leaf motor for a DIY electric car conversion?
Yes, the Nissan Leaf motor is a popular choice for DIY electric car builds due to its reliability, availability, and compatibility with many EV components. Its AC synchronous design offers smooth power delivery and regenerative braking capabilities.
What tools and skills are needed to install a Nissan Leaf motor in a DIY electric car?
Basic mechanical tools, welding equipment, and electrical knowledge are essential. You’ll also need experience with motor controllers, battery integration, and custom mounting fabrication to ensure safe and efficient operation.
How much does a Nissan Leaf motor cost for a DIY electric car project?
Used Nissan Leaf motors typically range from $500 to $1,500, depending on condition and model year. Salvage yards, eBay, and EV-specific suppliers are common sources for affordable, high-quality motors.
What challenges might I face when using a Nissan Leaf motor in a DIY electric car?
Key challenges include adapting the motor to non-Nissan transmissions, integrating the inverter/controller, and managing cooling systems. Proper research and community forums can help troubleshoot these issues effectively.
Is the Nissan Leaf motor powerful enough for a DIY electric car conversion?
The Nissan Leaf motor delivers 80–110 kW (107–147 hp), which is sufficient for lightweight vehicles and city driving. For higher performance, consider pairing it with a larger battery pack and upgraded controller.
Where can I find wiring diagrams for the Nissan Leaf motor in a DIY electric car setup?
Wiring diagrams are available in Nissan Leaf service manuals, EV conversion forums like DIYElectricCar.com, and YouTube tutorials. Always cross-reference multiple sources for accuracy and safety.