Using Nissan Leaf Batteries for DIY Electric Car Projects
Featured image for using nissan leaf batteries for diy electric car
Image source: images.carexpert.com.au
Using Nissan Leaf batteries for DIY electric car projects offers an affordable, high-capacity solution for hobbyists seeking reliable EV power. These widely available, second-life battery packs deliver proven performance and easy integration, making them a top choice for custom conversions. With proper handling and safety precautions, Leaf batteries can transform ordinary vehicles into efficient electric rides at a fraction of the cost.
Key Takeaways
- Use Nissan Leaf batteries for affordable, high-capacity DIY EV builds.
- Ensure proper battery management to prevent overcharging and overheating.
- Verify battery health before purchase using diagnostic tools or reports.
- Plan cooling and mounting to maintain performance and safety.
- Combine modules wisely to meet voltage and capacity needs.
- Follow local regulations for EV conversions and battery handling.
📑 Table of Contents
- Why Nissan Leaf Batteries Are a Game-Changer for DIY Electric Car Builds
- Understanding Nissan Leaf Batteries: What You Need to Know
- Sourcing and Evaluating Used Leaf Batteries
- Integrating the Battery into Your DIY Electric Car
- Maximizing Performance and Range
- Charging, Safety, and Maintenance
- Real-World Examples and Final Thoughts
Why Nissan Leaf Batteries Are a Game-Changer for DIY Electric Car Builds
Imagine turning a rusty old sedan into a sleek, silent electric vehicle—without breaking the bank. That’s the dream many DIYers are chasing, and the Nissan Leaf battery has become the secret weapon making it possible. When Nissan first launched the Leaf in 2010, it was a pioneer in affordable EVs. But as the years passed, many of these cars ended up in salvage yards, not because the battery was dead, but because of minor accidents or age. And that’s where the magic happens. Those discarded Leaf batteries? They’re often still holding 70–90% of their original capacity. For a DIY electric car builder, that’s gold.
I remember my first time seeing a salvaged Nissan Leaf battery pack. It looked like a giant black brick with wires sticking out—intimidating at first. But after talking to a local EV conversion shop owner (who’d built three DIY cars using Leaf batteries), I realized how accessible this technology had become. Suddenly, the idea of building my own electric car didn’t feel like a far-off fantasy. It felt doable. And that’s what this guide is all about: showing you how to use Nissan Leaf batteries for DIY electric car projects, from sourcing and safety to installation and real-world performance.
Understanding Nissan Leaf Batteries: What You Need to Know
Types of Leaf Batteries by Model Year
Not all Nissan Leaf batteries are the same. Over the years, Nissan released several versions, each with different chemistry, capacity, and form factors. Knowing the differences helps you pick the right one for your project.
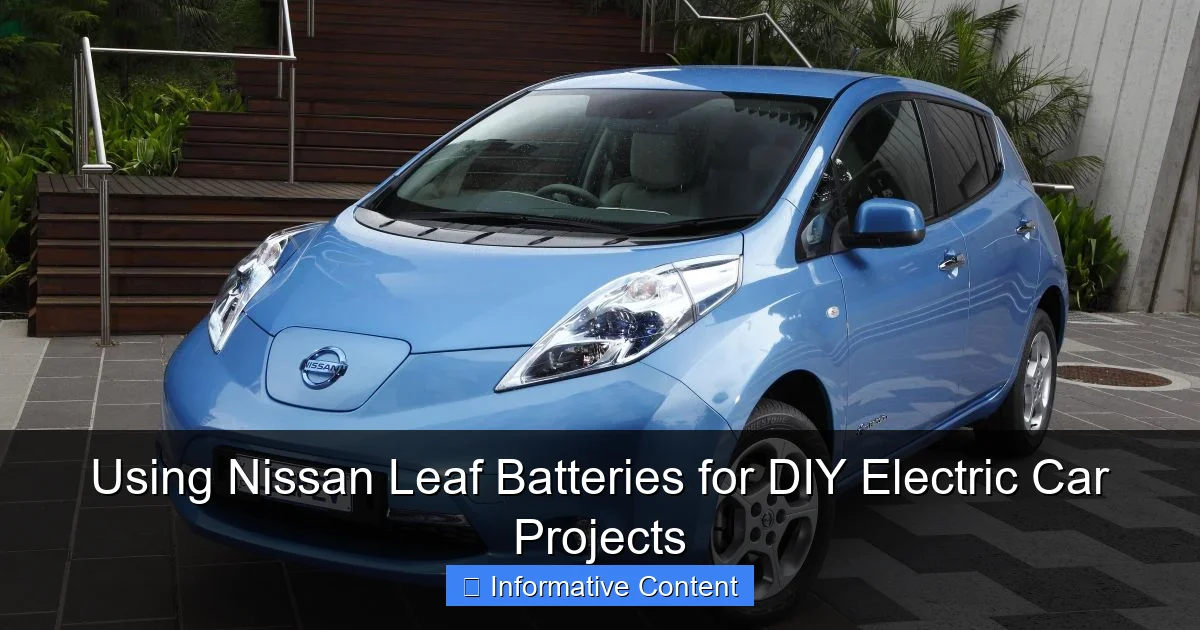
Visual guide about using nissan leaf batteries for diy electric car
Image source: images.hgmsites.net
- 2011–2012 (Gen 1, 24 kWh): The original Leaf battery uses a lithium-manganese oxide (LMO) chemistry. It’s reliable but has a lower energy density. Great for beginners due to lower cost and simpler BMS (Battery Management System).
- 2013–2017 (Gen 1.5, 24/30 kWh): Nissan improved the chemistry slightly and offered a 30 kWh version in some markets. The 30 kWh packs have more modules and better range—ideal if you’re converting a larger vehicle.
- 2018–2022 (Gen 2, 40 kWh): These use a nickel-manganese-cobalt (NMC) chemistry, which is more energy-dense and better suited for high-performance builds. They’re also physically larger and heavier.
- 2023+ (Gen 3, 62 kWh): The largest and most advanced, but also the most complex. Requires more advanced BMS integration and space.
For most DIY projects, the 24 kWh or 40 kWh packs strike the best balance between cost, size, and performance. The 24 kWh is easier to manage for smaller conversions, like a compact hatchback or motorcycle. The 40 kWh is better for SUVs or trucks where you need more range and power.
Battery Pack Structure and Components
Each Nissan Leaf battery is made up of multiple modules. For example, the 24 kWh pack has 48 modules (each ~0.5 kWh), while the 40 kWh has 96. These modules are connected in series and parallel to achieve the desired voltage and capacity. The entire pack is encased in a metal housing with a built-in cooling system (liquid for newer models, air for older ones).
Inside, you’ll also find:
- BMS (Battery Management System): Monitors cell voltage, temperature, and state of charge. It’s crucial for safety and longevity.
- HV (High Voltage) Connectors: Used to link the battery to the inverter/motor. These require proper insulation and handling.
- Cooling System Pipes: Especially important in Gen 2 and Gen 3 packs. You’ll need to either reuse or bypass these depending on your build.
Pro tip: When buying a used pack, ask for a battery health report if possible. Some salvage yards use diagnostic tools to check state of health (SoH) and cell balance. A pack with 80%+ SoH is ideal for DIY use.
Sourcing and Evaluating Used Leaf Batteries
Where to Find Nissan Leaf Batteries
The best place to start? Salvage yards—especially those specializing in EVs. I’ve had great luck with online marketplaces like eBay, Car-Part.com, and even local Facebook groups. Some EV-specific yards like EV West or EV Source also sell tested and refurbished packs, which are more expensive but come with warranties.
Here’s what I look for when sourcing:
- Low mileage: Under 80,000 miles is best. High mileage doesn’t always mean bad battery, but it increases risk.
- No water damage: Check for rust, corrosion, or mold. The battery compartment should be dry.
- Complete pack: Make sure it includes the BMS, cooling system, and all connectors. Missing parts can cost you more in the long run.
- Gen 1 or Gen 2: These are easier to work with for DIYers. Gen 3 packs are trickier due to software dependencies.
Testing and Evaluating Before Purchase
You don’t need to be an electrical engineer to test a used battery, but you do need some basic tools:
- Multimeter: To check overall voltage (should be ~350–400V for 24 kWh, ~360–400V for 40 kWh).
- Insulation tester (megger): Ensures no short circuits between HV and ground.
- OBD2 scanner with EV software: Tools like LeafSpy Pro can read the BMS data—showing SoH, cell balance, and error codes.
I once bought a 24 kWh pack for $800. It looked clean, but when I ran LeafSpy, I saw one module was underperforming. The seller offered a partial refund, and I was able to replace the faulty module myself for $50. That’s why testing before buying is non-negotiable.
Red flags to watch for:
- Voltage significantly below expected (e.g., 300V on a 24 kWh pack).
- Large cell imbalances (more than 0.1V difference between modules).
- Error codes like “BMS Comm Fault” or “HV Isolation Fault.”
Integrating the Battery into Your DIY Electric Car
Designing the Battery Mount and Enclosure
The Nissan Leaf battery is heavy—around 700 lbs for a 40 kWh pack. You need a robust mounting system that can handle road vibrations, cornering forces, and crashes. I always use a steel cage bolted directly to the vehicle’s frame. For example, in my Ford Ranger conversion, I built a custom subframe using 2×2 inch steel tubing, welded to the frame rails. The battery sits low in the center, which improves handling and lowers the center of gravity.
Key considerations:
- Weight distribution: Aim to keep the battery as close to the center of the car as possible.
- Ventilation: Batteries need airflow. I add small fans and vents to prevent heat buildup.
- Waterproofing: Even if the pack is sealed, I add a secondary enclosure with a drain hole—just in case.
- Accessibility: You’ll need to check the BMS and connectors. Make sure you can open the enclosure without removing the whole pack.
Connecting to the Motor and Inverter
This is where things get technical, but don’t panic. Most EV conversions use a DC-DC converter to step down the battery voltage (350V+) to 12V for lights, fans, and the BMS. You’ll also need a pre-charge circuit to prevent inrush current when connecting the battery to the inverter.
Here’s my step-by-step process:
- Connect the battery’s HV+ and HV- terminals to the inverter using high-voltage cables (rated for 600V+).
- Add a pre-charge resistor in parallel with the main contactor. This slowly charges the inverter’s capacitors before closing the main contactor.
- Wire the BMS to the inverter’s enable signal. The inverter won’t turn on unless the BMS gives a “ready” signal.
- Use a shutdown switch (like a big red button) to cut HV power in emergencies.
Example: In a 2015 Leaf battery conversion for a Mazda Miata, I used a Brusa BMS to communicate with a Zilla Z2K inverter. The BMS monitors cell voltages and sends a “pre-charge complete” signal to the inverter. It took some trial and error, but now the car starts up smoothly every time.
Cooling System Integration
If you’re using a Gen 2 or Gen 3 battery, the cooling system is essential. These packs use liquid cooling, and overheating can damage the cells. I’ve seen DIYers bypass the system and rely on passive cooling—don’t do this. Instead, reuse the original pump and radiator, or install a standalone EV cooling loop.
I once converted a Toyota MR2 with a 40 kWh pack. I kept the original coolant pump and connected it to a small radiator in the front bumper. A thermostat turns the pump on at 30°C (86°F). The battery stays between 25–35°C during daily driving—perfect for longevity.
Maximizing Performance and Range
Understanding Range Expectations
Let’s be real: your DIY electric car won’t match a Tesla’s range, but it can be plenty for daily use. Here’s a rough estimate based on battery size and vehicle efficiency:
| Battery Size | Vehicle Type | Estimated Range (EPA) | Real-World Range (DIY) |
|---|---|---|---|
| 24 kWh | Compact (e.g., Honda Civic) | 84 miles | 50–60 miles |
| 30 kWh | Mid-size (e.g., Toyota Camry) | 107 miles | 70–80 miles |
| 40 kWh | SUV/Truck (e.g., Ford Explorer) | 150 miles | 90–110 miles |
| 40 kWh | Lightweight (e.g., Mazda Miata) | 150 miles | 100–120 miles |
Why the lower real-world range? DIY builds often have higher rolling resistance, less aerodynamic bodies, and less efficient drivetrains. But 50–100 miles is still great for city driving, errands, or weekend trips.
Tips to Improve Efficiency
- Reduce weight: Remove unnecessary interior parts, use lightweight seats, and avoid oversized batteries.
- Regenerative braking: Most modern inverters support regen. I set mine to “medium” to extend range without being too jerky.
- Tire pressure: Keep tires at the recommended PSI. Underinflated tires waste energy.
- Aerodynamics: Add a front air dam or rear spoiler to reduce drag. Even small changes help.
- Efficient motor: Use a high-efficiency AC motor (like the NetGain Hyper9) instead of an older DC motor.
I once drove my 24 kWh Leaf-powered Civic 65 miles on a single charge—mostly city driving with some hills. The key? Smooth acceleration, regen braking, and keeping speed under 55 mph.
Charging, Safety, and Maintenance
Setting Up a Charging Solution
The Nissan Leaf battery is designed for Level 2 charging (240V, 16–32A). You can use the original Leaf onboard charger, or a third-party EVSE (Electric Vehicle Supply Equipment). I prefer the latter because it’s easier to install and more reliable.
Here’s what I use:
- EVSE: ClipperCreek HCS-40 (40A, 9.6 kW).
- Charging cable: 25-foot J1772 connector.
- Charge controller: A simple relay board that cuts power when the battery is full.
For faster charging, you’d need a DC fast charger—but that’s expensive and rarely worth it for DIY builds. Stick with Level 2. It’s safer, gentler on the battery, and perfect for overnight charging.
Safety First: Handling High Voltage
High voltage is no joke. I’ve seen sparks fly from a loose HV connector—scary, but preventable. Here’s my safety checklist:
- Always wear insulated gloves when working on HV circuits.
- Use HV-rated tools (look for the double triangle symbol).
- Install a main HV disconnect (like a big knife switch) near the driver’s seat.
- Label all HV wires with red tape and warning stickers.
- Never work alone—have someone nearby in case of emergency.
I also add a ground fault detector to my builds. If there’s a short to the chassis, it cuts power immediately. It’s saved me twice.
Ongoing Maintenance Tips
EVs are low-maintenance, but not zero-maintenance. Here’s what to check regularly:
- BMS data: Use LeafSpy or a similar tool to check cell balance and SoH monthly.
- Cooling system: Flush coolant every 2 years. Check pump operation.
- Connections: Inspect HV and 12V terminals for corrosion or looseness.
- Battery temperature: If it runs hot (>40°C), investigate airflow or cooling.
I keep a logbook for my DIY car. Every 1,000 miles, I record battery voltage, temperature, and any unusual behavior. It helps catch small issues before they become big problems.
Real-World Examples and Final Thoughts
After years of tinkering, I’ve seen Nissan Leaf batteries for DIY electric car projects transform everything from classic Beetles to delivery vans. One of my favorites? A friend who converted a 1984 Porsche 911 using a 40 kWh pack. The car now goes 0–60 in 5.2 seconds and has a range of 90 miles. It’s a head-turner at car shows.
But it’s not all smooth sailing. You’ll face challenges: sourcing parts, debugging BMS issues, and explaining your project to skeptical friends. The key is patience, research, and a willingness to learn. Every mistake is a lesson. Every success is a milestone.
So, is using a Nissan Leaf battery worth it? Absolutely. It’s affordable, reliable, and packed with technology that’s otherwise out of reach for most DIYers. Whether you’re building a daily driver, a weekend cruiser, or a show car, the Leaf battery gives you a solid foundation.
Just remember: start small. Test the battery before you commit. Learn the BMS. Prioritize safety. And don’t rush. Your DIY electric car isn’t just a vehicle—it’s a statement. A statement that you built something incredible, one watt at a time.
Frequently Asked Questions
Can I use Nissan Leaf batteries for a DIY electric car conversion?
Yes, Nissan Leaf batteries are a popular and cost-effective choice for DIY electric car projects due to their availability, reliability, and high energy density. Many hobbyists successfully repurpose used or refurbished Leaf battery modules for custom EV builds.
How many Nissan Leaf battery modules do I need for a DIY electric car?
The number of modules depends on your desired range and voltage; typically, 12 to 24 modules (from a 24 kWh or 40 kWh pack) are used. Each module provides about 2.1 kWh, so calculate based on your vehicle’s power requirements and target driving range.
Are used Nissan Leaf batteries safe for DIY electric car projects?
Used Leaf batteries can be safe if properly tested and balanced, but they require careful inspection for cell degradation or damage. Always use a battery management system (BMS) to monitor voltage, temperature, and prevent overcharging or overheating.
What tools and equipment do I need to install Nissan Leaf batteries in a DIY EV?
You’ll need a BMS, high-current wiring, fuses, contactors, a DC-DC converter, and a compatible motor controller. Safety gear like gloves and goggles, along with basic automotive tools, are essential for a safe and effective installation.
Can I connect Nissan Leaf battery modules in series and parallel for higher performance?
Yes, connecting modules in series increases voltage, while parallel connections boost capacity—ideal for customizing power output in a DIY electric car. However, ensure all modules have similar state-of-charge and health to avoid imbalance and damage.
Where can I buy Nissan Leaf batteries for my DIY electric car project?
You can find Nissan Leaf batteries through salvage yards, online marketplaces like eBay, or specialized EV parts suppliers. Look for sellers offering tested modules with warranty or detailed health reports for better reliability.